So, obviously, it was time. I wanted to go out and get him a bed, but Richard said he wants to build one. That is fine. It will no doubt be very awesome. Whenever he actually gets around to it. Someday.
We put his little mattress on the floor, but I thought the whole GOING TO BED thing might be more effective if it looked more like a bed, so I convinced Richard to let me get a little something, just until he has time to do his building. So I found a cheap little metal thing on KSL and made it mine!! Then I bought a can of spray paint at the local 5 and dime, and got to work. And I learned things about painting a bed that I didn't know before. And I want you to know them too. So HERE:
- Obtain a bed.
 You might think that this step goes without saying, but let's stay on the safe side, and say it anyway. Just in case. And don't spray paint the mattress. We're talking about the bed frame here. Again, this should be a given, but I find it is safest to cover all our bases.
 - Sand away any rough patches and imperfections on the bed frame. Lightly sand any existing paint so that new paint will stick to it. This only took me about 30 minutes to do. It would have been even faster, but I sanded for about 15 minutes using the wrong side of the sand paper, so I had to do it over again.
- Use the right side of the sand paper.


- As much as possible, work out on your front porch or in the front yard so that your neighbors and passersby will think you are a hard worker. Dramatically wipe your brow from time to time so that they will take pity on you and offer you a cold glass of lemonade.
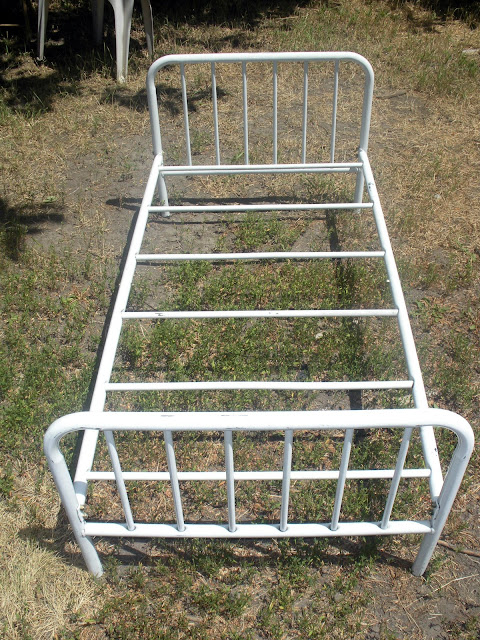
- Protect those surfaces you DON'T want painted. I laid a sheet of plywood down so that I wouldn't get paint all over the ground. Our "Lawn" is pretty (see fig. 1), and must be protected at all cost.
- Just Go For It: This was really my first time spray painting. (Not counting back in the day, when I used to spray paint things under the overpass, like "Modest is the Hottest" and "Have you see my Cat?" and things like that.) But I figured I really couldn't mess it up. What could be easier? All I had to do was press a button and wave my hand around. And I've been doing that with the TV remote for years!
- Do 2 or more LIGHT coats: About 3 minutes into it I realized that I COULD mess it up and I probably already had. That stuff coats fast and it will start dripping down the sides before you know it. That is when you thank your lucky stars that you only paid $15.00 for this silly bed and it really doesn't matter that much!!!
- Overestimate. I figured it would take me about a half a can of spray paint to do the bed, and planned to have enough left over to paint a little set of table and chairs as well. I was wrong of course. It took me a little less than 4 cans of spray paint. And because I kept figuring that SURELY this can would do it, I had to go back to the store 3 times. Argh!
But now it is done! The little boy is thrilled which is worth every minute spent. And if we stay a nice comfortable distance away it really looks pretty good. And with the white sheet and pillow on it it reminds me of a bed in a mental institution. Which is rather fitting.
 Welcome home, Bed.
